How to Add Featured Images or Post Thumbnails in WordPress
Featured images are a great way to make your post more attractive. Also known as, post thumbnails, featured images come up in the list of posts along with the title of each post. While it was not a very common feature in many themes back when it all started, now most of the themes support it and the store even has plug-ins for it. You can use the plug-ins to extend the functionality and get featured images or post thumbnails for themes that do not support it. This article will help you set a featured image for your post by two methods.
Keep in mind that featured images and post thumbnails are the same things. When WordPress came out with this feature, it was called Post Thumbnails, but in later versions it was renamed Featured Images.
Set Featured Image through GUI
 This is an easy method. When you are writing a post, you can set a featured image before you start or when you are done writing it. Although many sites claim that this is a theme-based feature, I have seen that the option to add a featured image is always present.
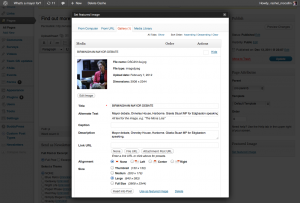
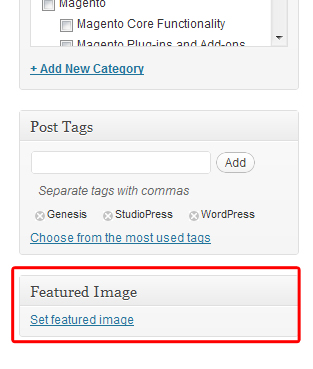
When writing or editing a post, scroll down a little bit and check if there is a Meta box, titled Featured Images. If you cannot find it, your theme does not support featured images.
If the box is there, however, click on the link button inside that box. This will open up a new dialog box asking you to choose from already uploaded images. If you want to set a new image, click on the tab titled “Upload” and then upload the file through either of these two means.
- Click on the button to select the file from a file dialog box.
- Simply drag and drop the file on to the dialog box to upload it.
Either way, when the file is uploaded, it is automatically selected. Just click on the button, which is labeled “Set Featured Image” and you are done. You will see the image replace the link in the Meta box.
Set Featured Image through PHP
For all the developers out there, there is another way using which you can set featured images. With this, you can even change the themes that do not support featured images. You need to code in php, so open up the theme’s core file, titled “functions.php” and then add this line of code:
add_theme_support( 'post-thumbnails' );
Adding this line will enable support for featured images in all sorts of posts and pages. After doing this, when you go to the themes page, you will see the Meta box we talked about earlier. Now to display those images in the theme you’ll need to code again. You’ll need to edit your template, to be precise. Add the following line of code where you want the featured image to be displayed:
The files to that you add this code may vary from theme to theme, so it is better to have this code inside the post loop. Your work is not done as of yet; you need to set the size of the thumbnails to make them a part of the theme. To do that, open the functions.php file again and add his line of code:
set_post_thumbnail_size( 50, 50);
50 and 50 are not supposed to be hard and fast. These are just the parameters, which can be changed. The first 50 represents the width and the second represents the height. Furthermore, you can set extra image sizes to go with the post thumbnail function. For instance:
add_image_size( 'single-post-thumbnail', 590, 180 );
This is it; you are done! Have fun playing with the themes and if you have any doubts, make sure to enlist the help of a developer to straighten out the issues. Otherwise, you might end up spending countless hours figuring out the errors and ways to resolve them. Make sure to comment below and let us know if you enjoyed reading this post and found it helpful.
-
 Posts vs. Pages in WordPress – The Difference
More than once, a WordPress beginner has been known to ask the difference
Posts vs. Pages in WordPress – The Difference
More than once, a WordPress beginner has been known to ask the difference -
 How to create an Image Gallery in WordPress
So you are back from that trip across Europe and your camera roll
How to create an Image Gallery in WordPress
So you are back from that trip across Europe and your camera roll -
What is Caching for WordPress and Why You Need It
Everyone, who is anyone with prior technical knowledge, knows what WordPress is. For
About Author
OnWPThemes
OnWPThemes is a blog all about WordPress Themes - Find the amazing beautiful Premium WordPress Themes coupled with advanced functionality and get great money off deals with coupons.